🧰 Web3 [Serie Part 1/10] - Setup Environment
![🧰 Web3 [Serie Part 1/10] - Setup Environment](/content/images/size/w960/2021/09/web3js-tutorial-part0-1.png)
Introduction
At the end of this section, we will have a development environment setup allowing us to pursue the whole tutorial.
We are going to install 4 components:

Create Directory
Let's create a directory we will name web3-tutorial.
Install NodeJs
Download and install the LTS version of Node.

Install Truffle
What is Truffle?
Truffle is a development environment, testing framework and asset pipeline for Ethereum, aiming to make life as an Ethereum developer easier. For more information, please check their website.
In our terminal, in our directory, we run:
npm install -g truffleInstall Web3 (JS library)
Web3 is a collection of libraries that allow you to interact with a local or remote Ethereum node using HTTP, IPC or WebSocket. For more information, please check their website.
In our terminal, in our directory, we run:
npm install web3Install Ganache
What is Ganache?
Ganache allows you to quickly fire up a personal Ethereum blockchain which you can use to run tests, execute commands, and inspect state while controlling how the chain operates. For more information, please check their website.
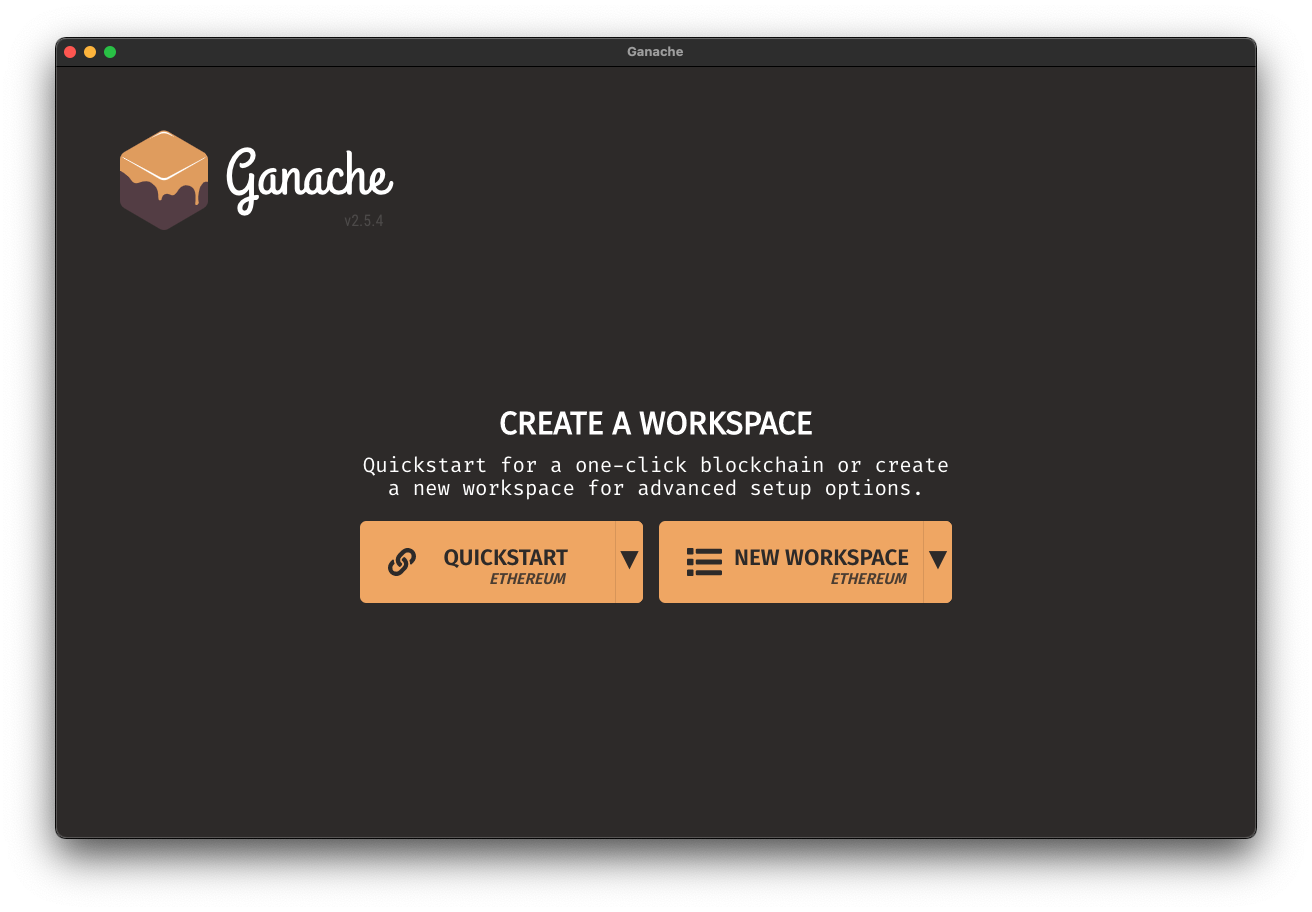
Download and install the latest version of Ganache from here: https://www.trufflesuite.com/ganache
Once installed, launch Ganache and click on Quickstart.
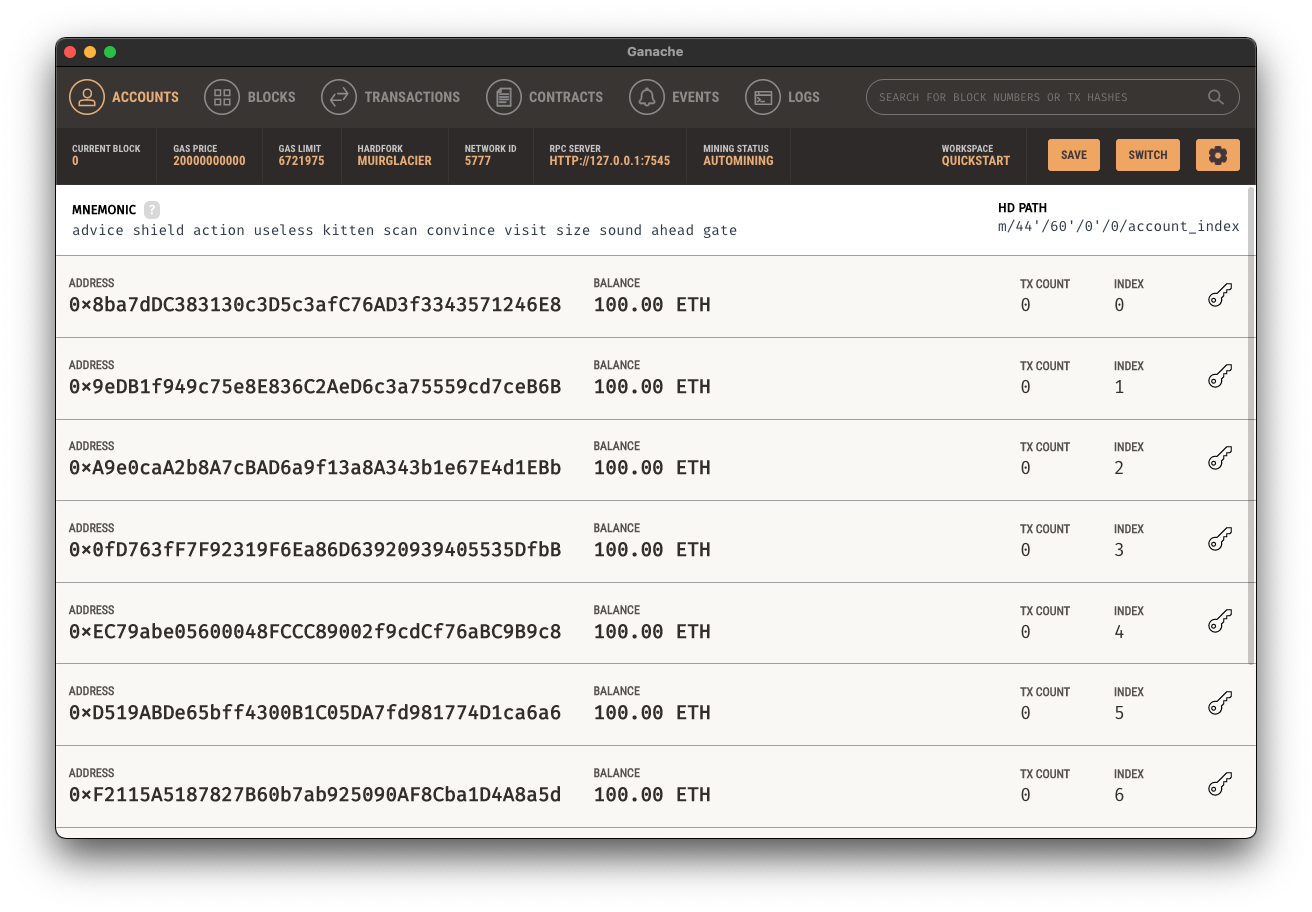
After loading, you should see the below screen. By default, Ganache will create 10 accounts with 100 Ether balance on each (calm down, these are fake 😘).
At the end, we have the following directory tree:
├── node_modules
├── package-lock.json
└── package.json
🎉 🥳 👯♂️ 🎈 Congratulations! We successfully setup our development environment. We are ready to move on to the next lecture: Connect Web3 to Ganache.
![🧰 Web3 [Serie Part 7/10] - Listen to Smart Contract Events](/content/images/size/w750/2021/09/web3js-tutorial-part0-7.png)
![🧰 Web3 [Serie Part 6/10] - Send Ether to a Smart Contract](/content/images/size/w750/2021/09/web3js-tutorial-part0-6.png)
![🧰 Web3 [Serie Part 5/10] - Send Transactions to a Smart Contract (sendTransactions API)](/content/images/size/w750/2021/09/web3js-tutorial-part0-5.png)
![🧰 Web3 [Serie Part 4/10] - Call A Smart Contract](/content/images/size/w750/2021/09/web3js-tutorial-part0-4.png)