🧰 Web3 [Serie Part 5/10] - Send Transactions to a Smart Contract (sendTransactions API)
![🧰 Web3 [Serie Part 5/10] - Send Transactions to a Smart Contract (sendTransactions API)](/content/images/size/w960/2021/09/web3js-tutorial-part0-5.png)
Introduction
In the previous lecture, we read data from our Smart Contract. In this lecture, we are going to write data in our Smart Contract. To perform this operation, we will be using the second API, called eth_sendTransaction.
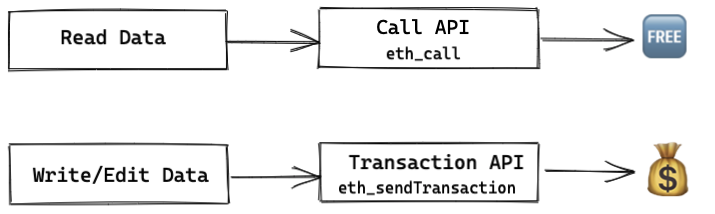
Reminder: if we send transactions to a Smart Contract, we actually change the blockchain. If changes occur, it must be mined, thus it will cost some gas fees.
Send Transactions
Let's reuse our previous index.js initial code:
const Web3 = require('web3');
const MyContract = require('./build/contracts/MyContract.json');

const main = async() => {
    const web3 = new Web3('http://127.0.0.1:7545');

    const id = await web3.eth.net.getId();
    const contract = new web3.eth.Contract(
        MyContract.abi,
        MyContract.networks[id].address
    );
}

main();In this case, we will be using the other method called 'methods.myMethod.send'. Unlike the call method, we cannot leave parameters blank here. Since the execution will cost some gas, we have to define what address we will pay with.
- From: the address from which we will send the transaction. In this case, we will use one among the 10 automatically generated addresses from Ganache. In production, we would have use Metamask for instance. This part will be covered in next parts of this tutorial.
It’s important to use an async function. Since we are using a local development environment, the mining will be executed immediately. But, on the Mainnet or any other Public Test environment, a transaction mining could take up to 15sec. Thus, it’s important to wait for the results.
Here is the code. Comments are following.
const Web3 = require('web3');
const MyContract = require('./build/contracts/MyContract.json');

const main = async() => {
    const web3 = new Web3('http://127.0.0.1:7545');

    const id = await web3.eth.net.getId();
    const contract = new web3.eth.Contract(
        MyContract.abi,
        MyContract.networks[id].address
    );

    const accounts = await web3.eth.getAccounts();

    const result1 = await contract.methods.get().call();

    const receipt = await contract.methods.set(100).send({
        from: accounts[0]
    });

    const result2 = await contract.methods.get().call();

    console.log(result1);
    console.log(receipt);
    console.log(result2);

}

main();- First, we collect the generated accounts by Ganache, and store it in the array accounts. In this case, we will be using the first account, thus accounts[0].
- Next, we use our previous method, to check the value of data, with the get function. We will see that its value is 0 (cf. previous part).
- Then, we use the 'send' method, and we set the value to 100.
- Finally, we reuse the 'call' method to check if the data was properly updated to 100.
Here is our results:
0
{
  transactionHash: '0x9fbfd81501900d167879cd9bd5bda508726af622993eed09d297e7d7acfaa971',
  transactionIndex: 0,
  blockHash: '0x9ded0d30c75b6a881fbf3382973e81c6cdac070741912028a635652face5f5ec',
  blockNumber: 5,
  from: '0x8ba7ddc383130c3d5c3afc76ad3f3343571246e8',
  to: '0xdfc6bf4043de741a57f57d1f065e365849f5af7c',
  gasUsed: 41424,
  cumulativeGasUsed: 41424,
  contractAddress: null,
  status: true,
  logsBloom: '0x00000000000000000000000000000000000000000000000000000000000000000000000000000000000000000000000000000000000000000000000000000000000000000000000000000000000000000000000000000000000000000000000000000000000000000000000000000000000000000000000000000000000000000000000000000000000000000000000000000000000000000000000000000000000000000000000000000000000000000000000000000000000000000000000000000000000000000000000000000000000000000000000000000000000000000000000000000000000000000000000000000000000000000000000000000000',
  events: {}
}
100First, we see 0. Which is what we expected.
Then, we get the receipt of the transaction, which corresponds to the Transaction Hash:
- transactionHash: hexadecimal string that uniquely identifies the transaction on the blockchain. In prod, you could use that transactionHash in Etherscan to see your transaction details.
- blockHash: the hash of the block in which the transaction was mined,
- From: the address that sends the transaction. As you can see, we recognize our previously stated address there.
- To: is the recipient address of the transaction, which is our Smart Contract address,
- gasUsed: how much gas were used to mine the transaction
Finally, we get the updated value of 100.
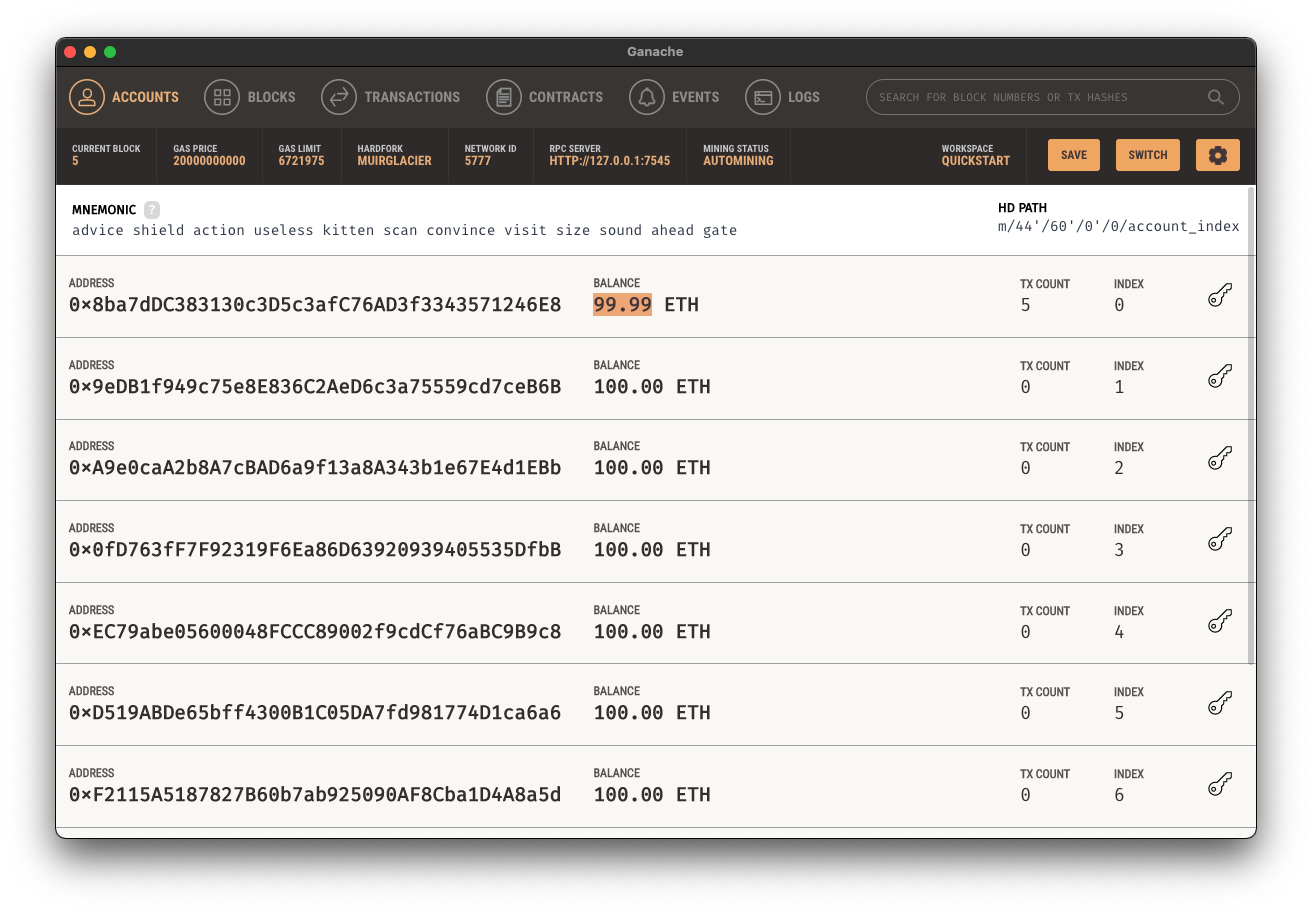
As you can see in Ganache, our first account has less than 100 ETH now, since it paid the transaction.
🎉 🥳 👯♂️ 🎈 Congratulations! We successfully send our first transaction using the set() method from our Smart Contract. In the next lecture, we will send Ether to the Smart Contract !
![🧰 Web3 [Serie Part 7/10] - Listen to Smart Contract Events](/content/images/size/w750/2021/09/web3js-tutorial-part0-7.png)
![🧰 Web3 [Serie Part 6/10] - Send Ether to a Smart Contract](/content/images/size/w750/2021/09/web3js-tutorial-part0-6.png)
![🧰 Web3 [Serie Part 4/10] - Call A Smart Contract](/content/images/size/w750/2021/09/web3js-tutorial-part0-4.png)
![🧰 Web3 [Serie Part 3/10] - Create A Contract Instance](/content/images/size/w750/2021/09/web3js-tutorial-part0-3.png)