🧰 Web3 [Serie Part 9/10] - Web3 & Metamask 🦊
![🧰 Web3 [Serie Part 9/10] - Web3 & Metamask 🦊](/content/images/size/w960/2021/09/web3js-tutorial-part0-9.png)
What is Metamask?
Metamask is a crypto wallet and a gateway to blockchain apps
More information on their website here.
How is Metamask included in our process?
When a transaction occurs, the frontend will send a signing request to Metamask. Then Metamask will ask the end user for signing or refusing the transaction.
If the user accepts the transaction, Metamask will sign it before sending it to the chosen blockchain. Metamask can connect to various networks such as the Mainnet, Public Testnet (Kovan, Ropsten, etc.), or even our local Blockchain.
Metamask will take care itself how to send the transaction to the required network, using Infura for instance when the chosen network is Mainnet or Public Testnet.

How to install Metamask?
Installing Metamask is quite easy.
- Open Google Chrome or any other supported Browers (Chrome, Firefox, Brave, or Edge)
- Add the Metamask extension, using this link
- Follow the installation steps (don't forget to keep secret and in a safe place your Secret Backup Phrase)
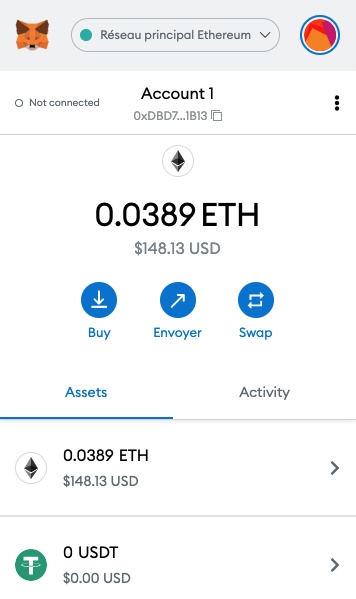
- Once installed you should be connected to the Ethereum Mainnet by default, on the Account 1
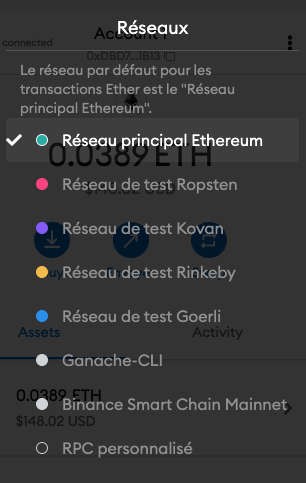
By clicking to the top, where it's written 'Réseau Principal Ethereum', you will see various available networks, as well as Custom RPC (mine is in French).
Now that we installed Metamask, we are ready to move on to our scripts.
Signing Transactions from an App using Metamask
In this section, we will re-use the contract we deployed on Ropsten network, in the section 8.
We will also use a simple Vue-App to perform the signed transaction. No worries, you don't need to know Vue to perform this part. We won't go in details on that front App part.
Setup Vue App
First, to use Vue we need a global addon to be installed with the Vue CLI. More info, here. Before launching this command, make sure we get the required permission, by switching to Super User mode. (E.g. using mac, we can type the following command, and enter your password).
sudo suThen, we run:
npm install -g @vue/cli @vue/cli-service-globalOnce installed, we can create our Vue App, by running the following command:
vue create clientIn the menu, we select the Default Vue2 option:
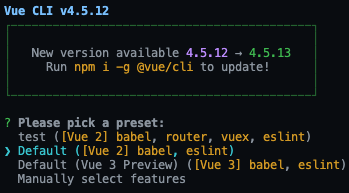
Actually, we ask Vue to create a new App named client, using Vue2 here.
Now, you should have a directory tree similar to:
├── client ==> this is what we just created, using create vue client
│   ├── README.md
│   ├── babel.config.js
│   ├── node_modules
│   ├── package-lock.json
│   ├── package.json
│   ├── public
│   │   ├── favicon.ico
│   │   └── index.html
│   └── src
│       ├── App.vue
│       ├── assets
│       │   └── logo.png
│       ├── components
│       │   └── HelloWorld.vue
│       └── main.js
└── contract ==> where our contract stuff are stored (cf. part 8)
Let's clean a bit before going further.
In the client, directory, we find the 'HelloWorld.vue' components:
client/src/components/HelloWorld.vueWe delete everything, and we paste the following code:
<template>
  <div>
    <button>SendTransaction</button>
  </div>
</template>

<script>
export default {

}
In our terminal, in the client directory, we run
npm run serveWe have the following result:
> [email protected] serve
> vue-cli-service serve

 INFO  Starting development server...
98% after emitting CopyPlugin

 DONE  Compiled successfully in 1828ms                                                                                             21:08:18


  App running at:
  - Local:   http://localhost:8082/
  - Network: http://192.168.1.6:8082/

  Note that the development build is not optimized.
  To create a production build, run npm run build.
Now, we go to the Network address 'http://192.168.1.6:8082/' and we make sure we have the following result:
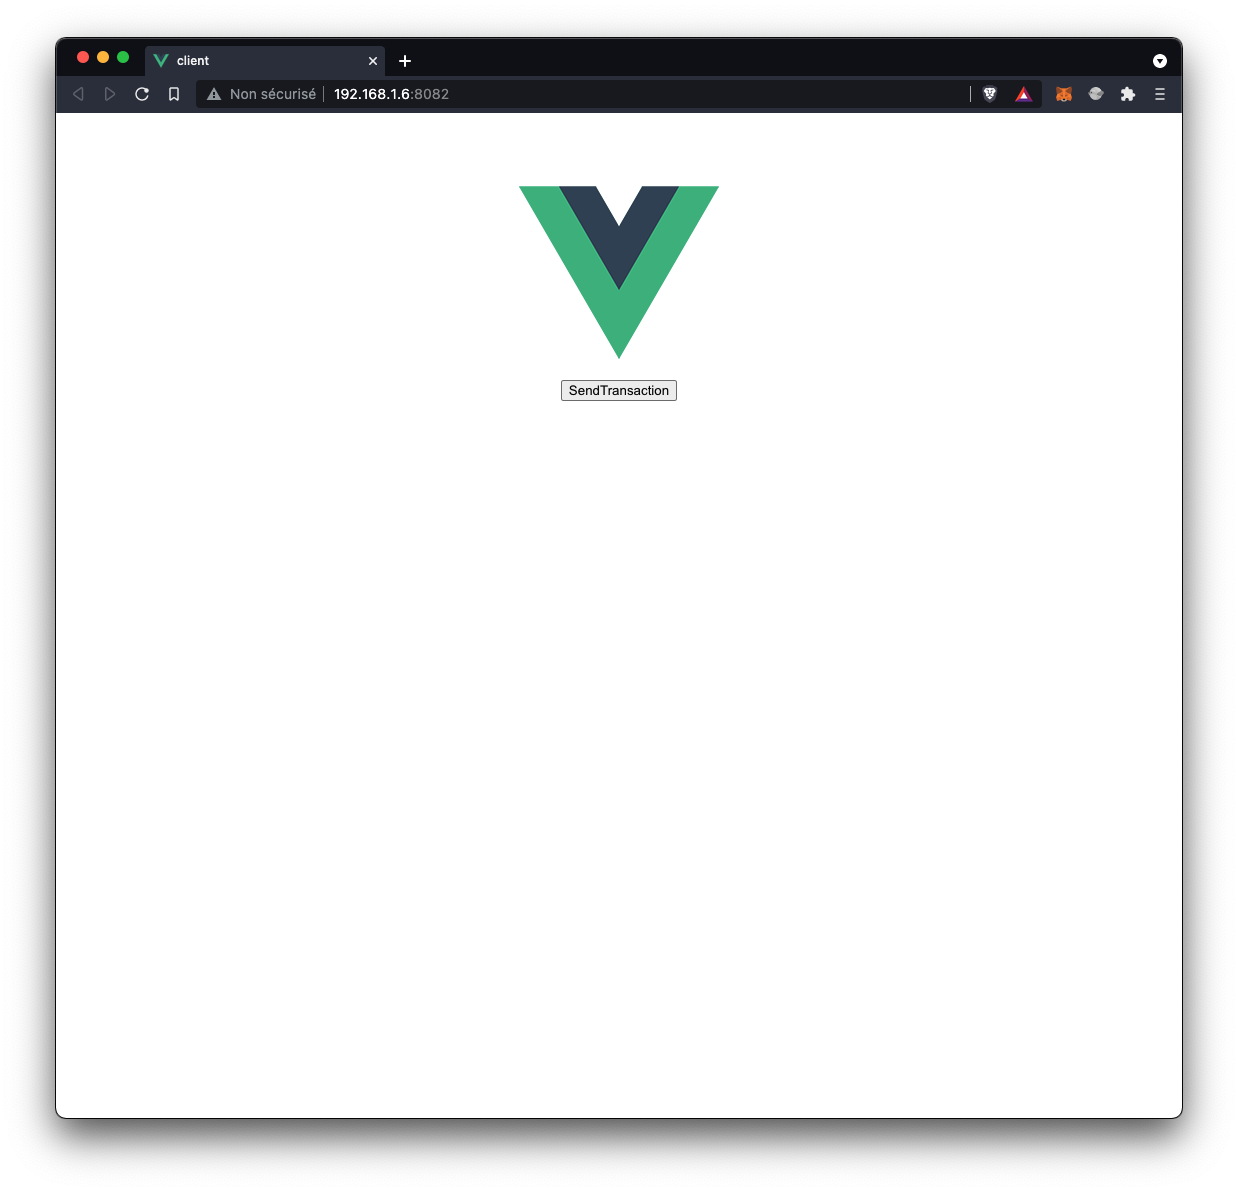
We can see a SendTransaction button under the Vue logo.
Now let's code the interaction with Metamask.
We will split the next steps, in 2 parts: connect Metamask with our App, and then send a signed transaction. In our case, the transaction will consist in setting a new value using the set function.
In the next lines, I will do my best avoiding going in the Vue details, which is not the aim of the course.
Connect Metamask with our Vue App
First, we need to install some libraries:
- the Metamask 'detect-provider' libray and,
- the Web3 library
In our client directory, we run the following command in our terminal:
npm install @metamask/detect-provider web3Now, we successfully installed the 2 libraries.
Here the updated 'HelloWorld.vue' code. Comments are following.
<template>
  <div>
    <div >{{ accounts[0] }}</div>
    <button>SendTransaction</button>
  </div>
</template>

<script>
import detectEthereumProvider from '@metamask/detect-provider';
import Web3 from 'web3';
import MyContract from '../../../contract/build/contracts/MyContract.json';

export default {
  data() {
    return {
      contractAbi: MyContract.abi,
      contractAddress: "0xe49082b47dA1f0E9FAEfc6463f0ef9aA114657A8",
      provider: '',
      web3: '',
      contract: '',
      accounts: '',
    }
  },

  async mounted() {
    await this.setup();
    this.provider = await detectEthereumProvider();
    if(this.provider){
      await this.getAccounts();
    }else{
      console.log('Please, Install Metamask!');
    }

  },

  methods: {
    async setup(){
      this.web3 = new Web3(window.ethereum);
      this.contract = new this.web3.eth.Contract(this.contractAbi, this.contractAddress);
    },

    async getAccounts(){
      this.accounts = await this.provider.request(
        {
          method: 'eth_requestAccounts',
        }
      )
    }
  }
}
</script>
For those who don't know Vue structure, .vue file are split into 2 main parts: the template, and the scripts. Here the template part is our HTML displaying the button, while the script part will include our Metamask logic.
Importations:
- We import the 2 libraries, we previously installed
- We import our contract ABI we build in the part 8 of the course.
In the data part, we define several variables we will be using:
- contractAbi: our contract generated ABI when we built and migrated our contract to the Ropsten network (cf. part 8).
- contractAddress: our contract address is stored here. this is the address we got when we deployed our contract on the Ropsten network (cf. part 8) (if you lost it, please restart the deployment part to the Ropsten network. You will get a new address).
- provider: our provider instance will be stored here
- web3: our web3 instance will be stored here
- contract: our contract instance will be stored here
- accounts: this variable will be used to store the connected account(s) address with Metamask. In our case, it will include only one address. But, if we would connect several accounts with Metamask, they would be store in the accounts array.
Now, let's generate the different required instances, and store them into our lovely variables. For this part, we need different methods:
setup function
- we instantiate our web3 using the window.ethereum provider (detect the Ethereum provider) provided by Metamask.
- we instantiate our contract using web3 instance, our contract ABI ('including functions, and variables of our Smart Contract'), and our contract address ('where our contract is stored in the Ropsten Network').
getAccounts
- Using the ethereum.request methods (more info from Metamask doc here), we ask Metamask to provide us with the list of connected accounts. This will be useful to sign the transaction later.
Now, in the 'mounted' part (part of the Vue lifecycle when the page is mounted. For those who are not familiar with Vue, keep in mind that this part will be ran when we load the page, more info here.), we need to run our methods to connect Metamask with our App, and get the available accounts:
- First we ran our setup method, to connect Metamask with our Vue App
- Then, we detect the provider provided by Metamask. If available we collect the connected accounts addresses, else, we ask our user to install Metamask.
Now, we successfully connected Metamask with our Vue App, and collected the available accounts.
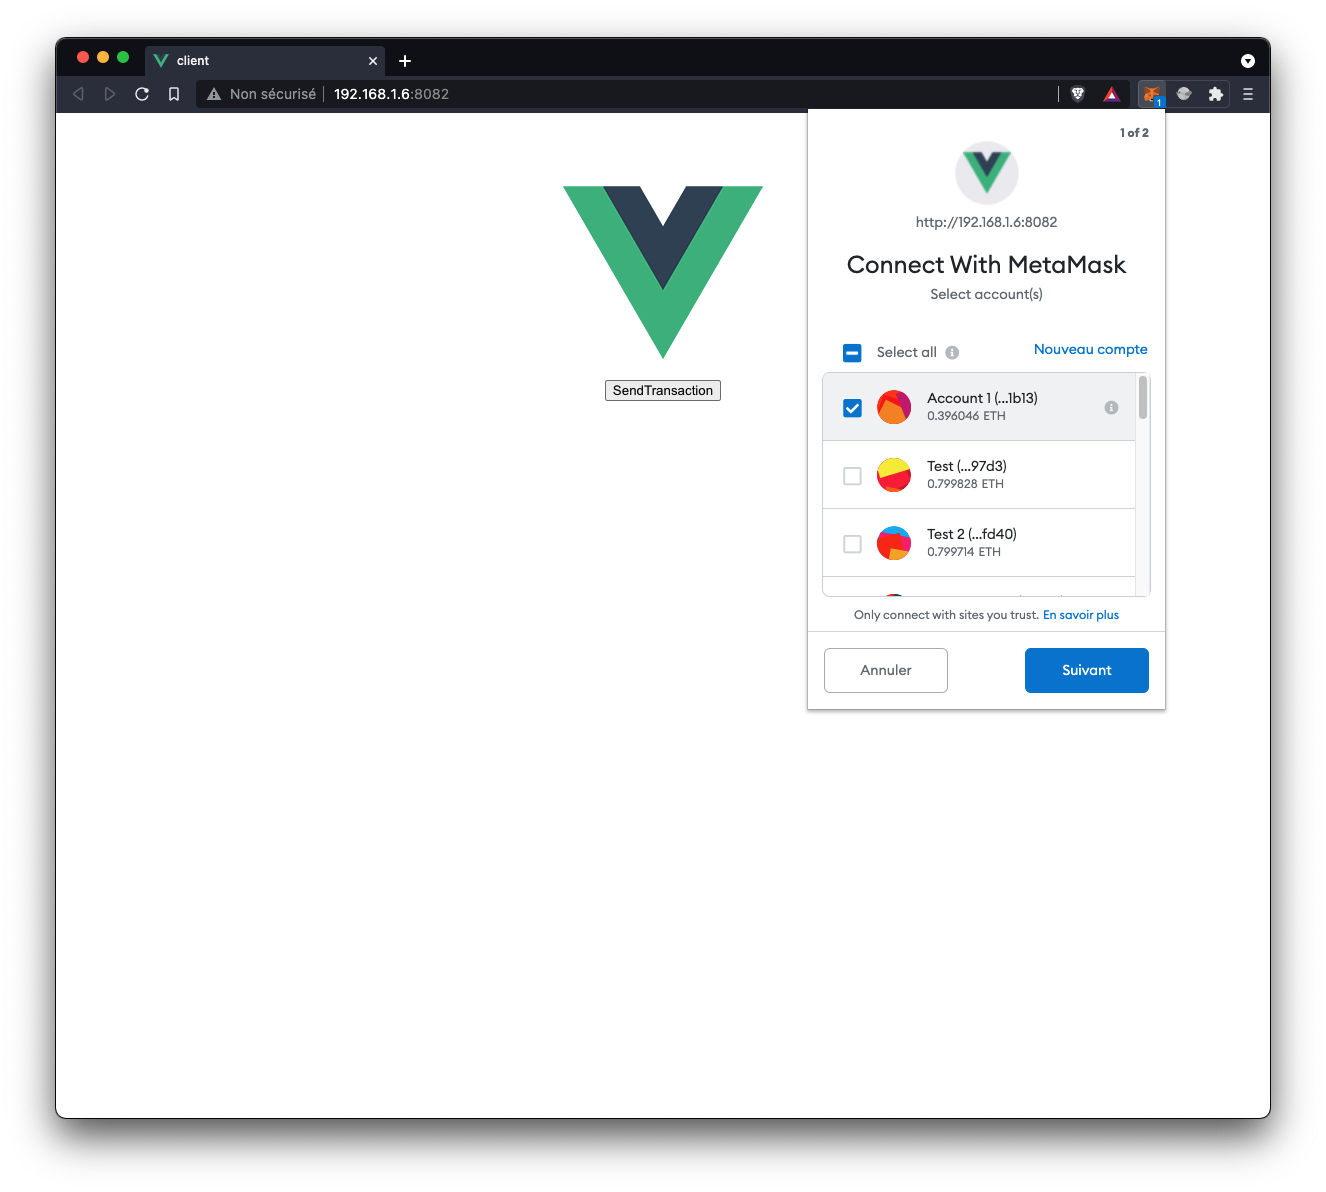
When reloading your Vue App, we should see Metamask appearing, asking to select account(s) to connect with the App. We select an account (with some Faucet ETH), click Next, and Connect.
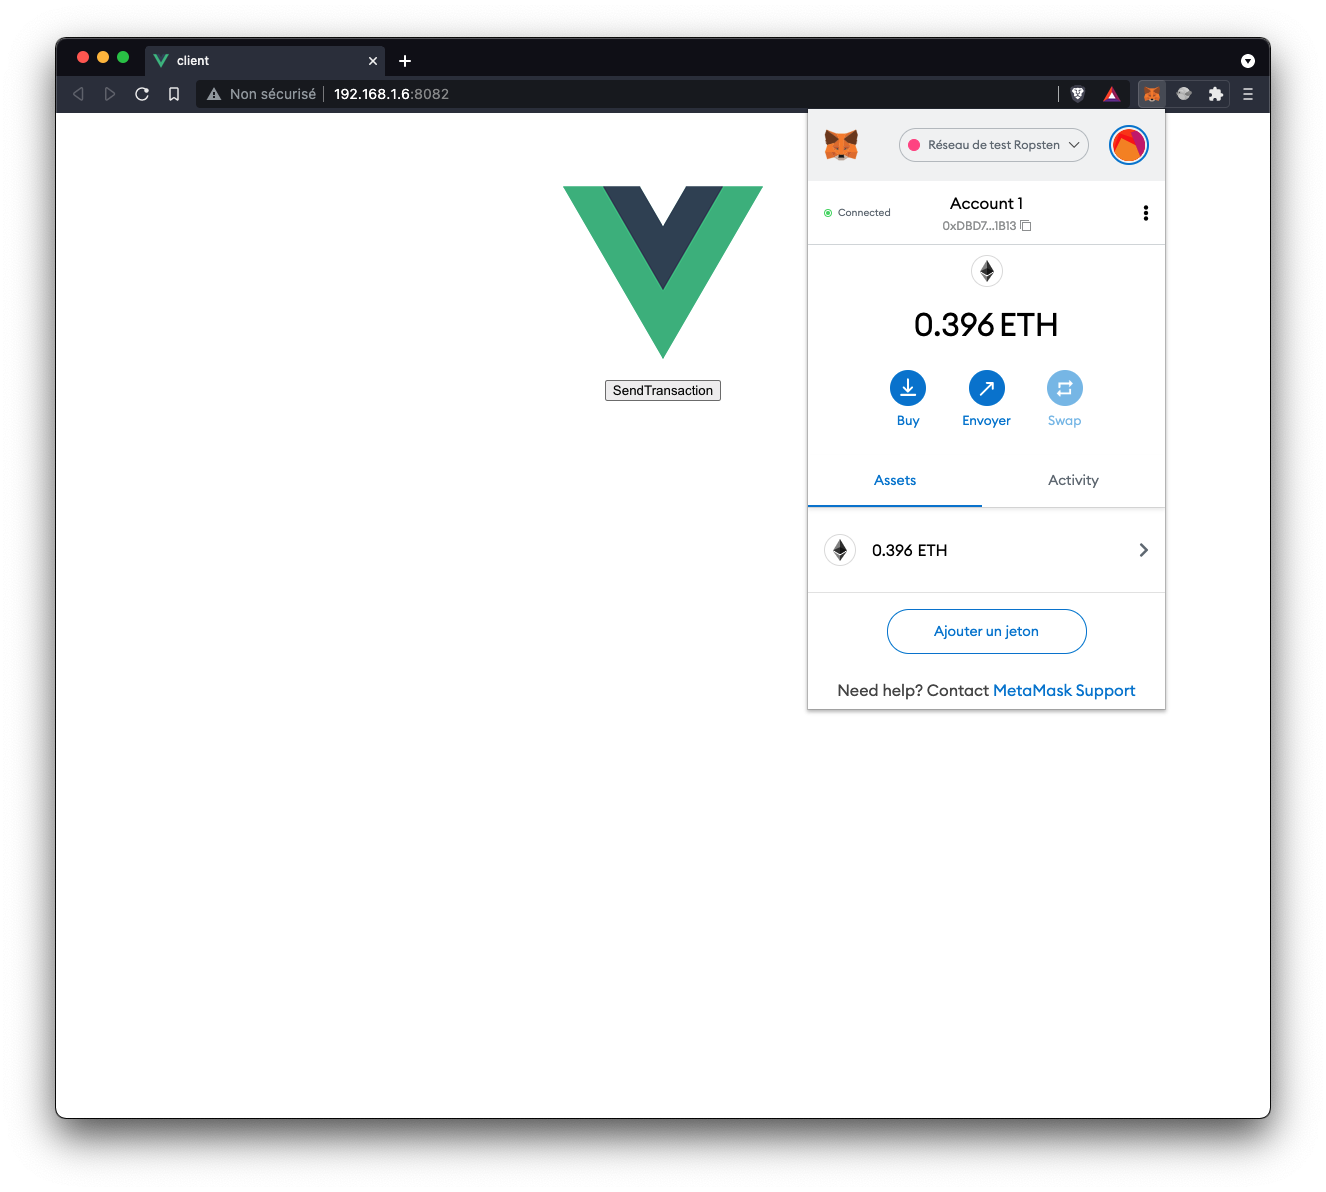
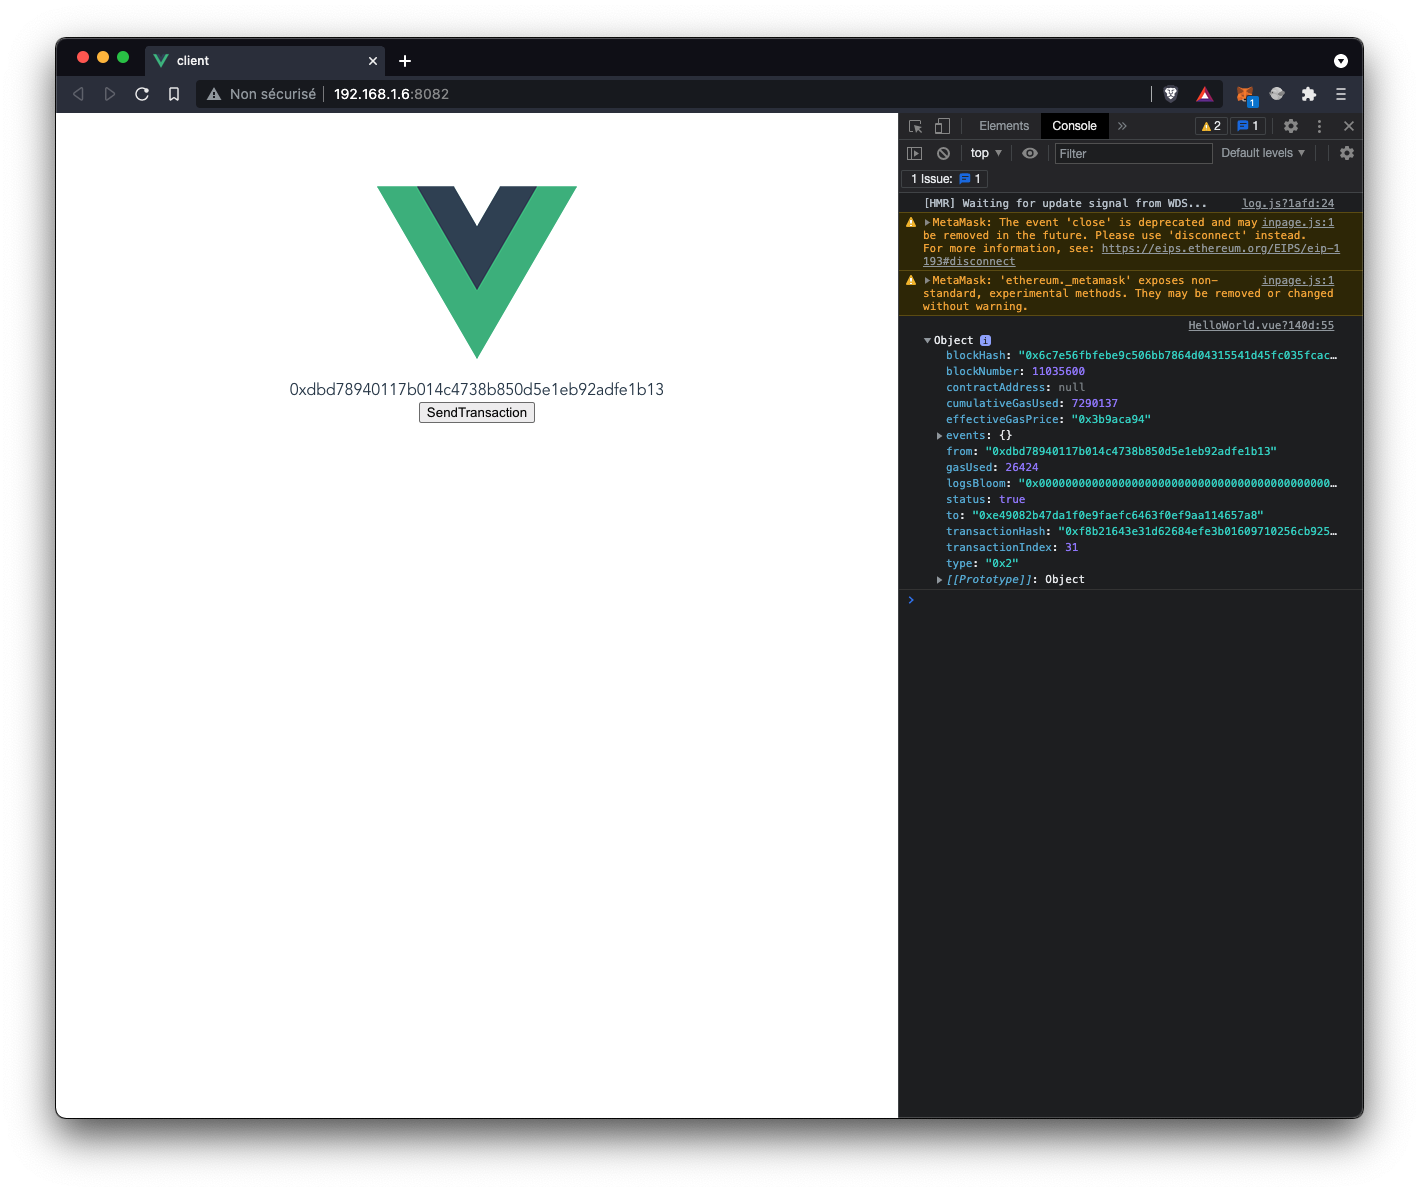
We can see that we are successfully connected:
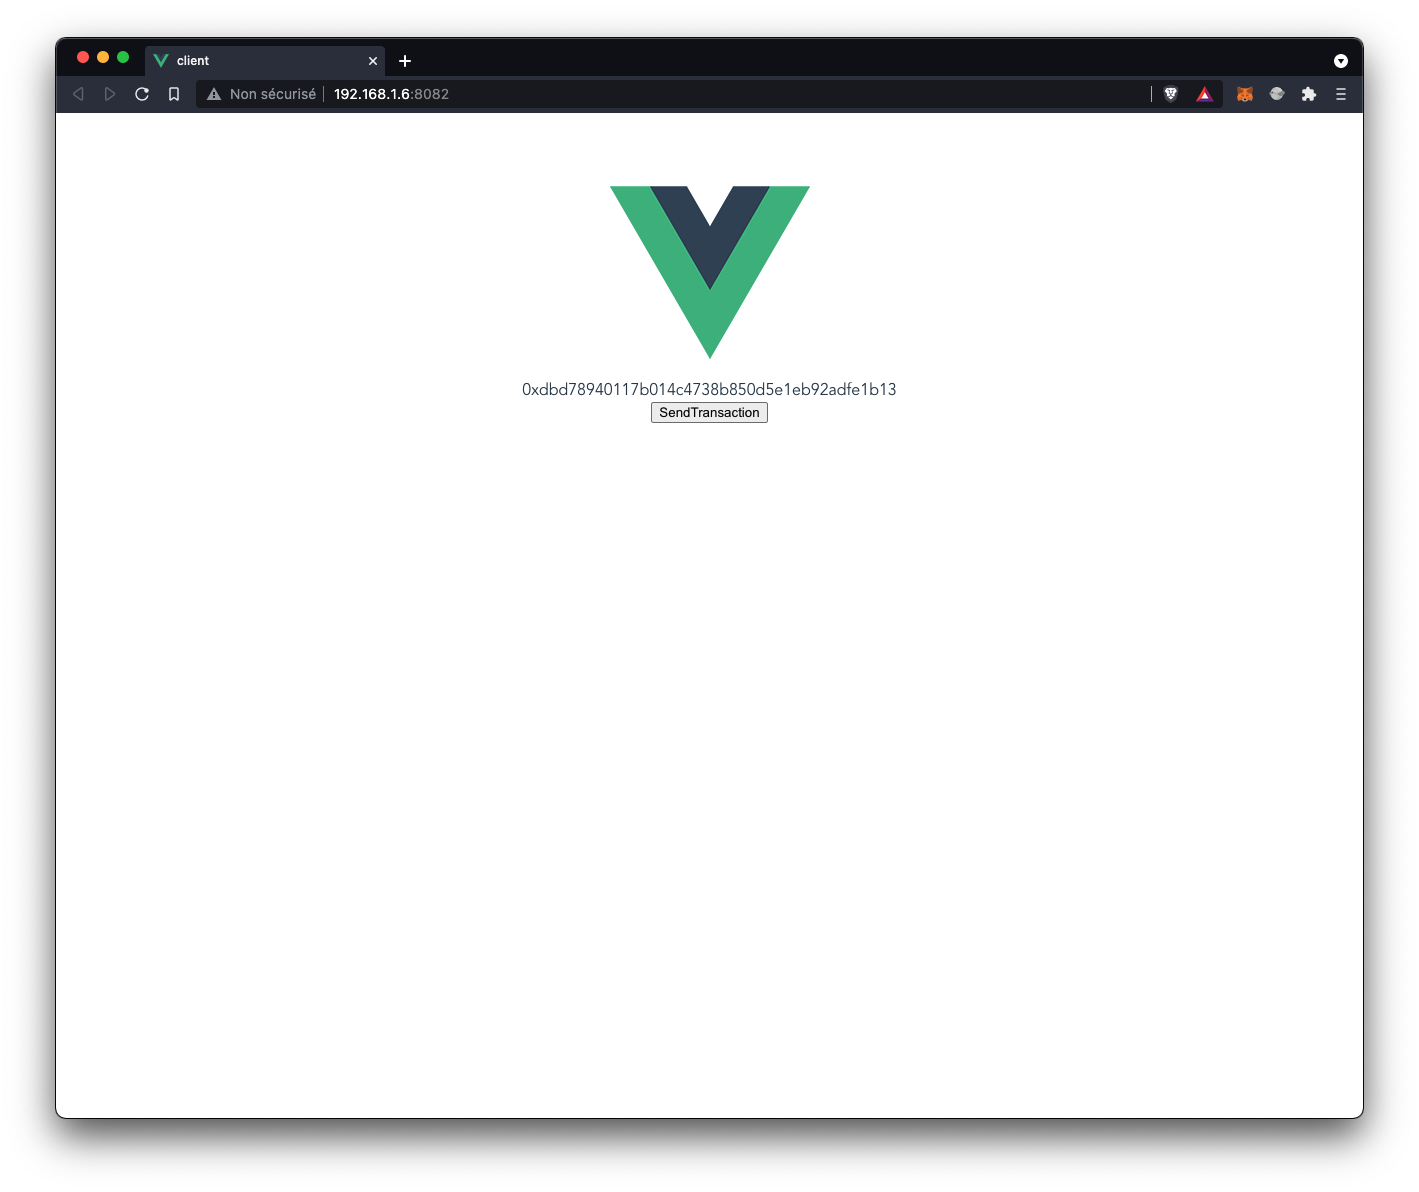
In the template, we print our accounts[0] value, to see that we are well connected.
Please bear with me, we are close to our objective.
Send Signed Transaction to our Smart Contract
To keep things simple, by pressing the button 'SendTransaction' we created, we will change the uint in our contract from 10 to let's say 100.
Let's code it.
Now that we are connected, and we have the account address, we can send a signed transaction to our contract by simply adding the following function to our script part. Here are the updates to perform in our code. Comments are following.
In the data part, we add a new variable called message, with the value we want to set in our Smart Contract, 100.
data() {
    return {
      contractAbi: MyContract.abi,
      contractAddress: "0xe49082b47dA1f0E9FAEfc6463f0ef9aA114657A8",
      provider: '',
      web3: '',
      contract: '',
      accounts: '',
      message: 100,
    }
  },
In the methods, we add a new method called setNewValue. Comments are following.
async setNewValue(){
      const receipt = await this.contract.methods.set(this.message.toString()).send({
        from: this.accounts[0],
      });
      console.log(receipt);
}- We use our contract instance, selecting the 'set' method, and we send the new value stored in the message variable, that we convert into a String.
- As parameter, we add the source accounts
- Finally, we console log the receipt of the transaction.
Now we need to link this method with our button, by updating the code as following:
<template>
  <div>
    <div >{{ accounts[0] }}</div>
    <button @click="setNewValue">SendTransaction</button>
  </div>
</template>
Now, in our App, we can click on the SendTransaction button. A Metamask window opens showing us our transaction details, and the gas fees we will pay to process the transaction.
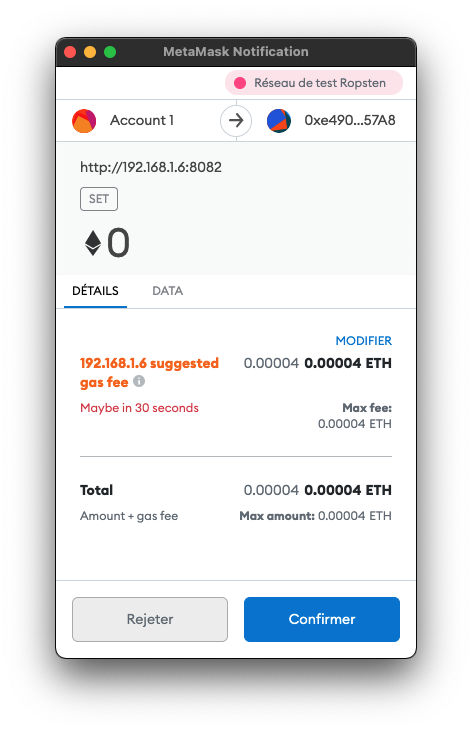
Click on Confirm, and now let's wait a couple of seconds/minutes.
In our Chrome Console (right click in the page > inspect), we should see the Transaction receipt console.log when the transaction will be fully processed.
Let's check in Ropsten Etherscan, if we see our new value of 100 instead of 10.
- Go on https://ropsten.etherscan.io/
- Paste our Contract Address, in this case: 0xe49082b47dA1f0E9FAEfc6463f0ef9aA114657A8
- We can see our transaction on the top of the table
- Click on the transaction > click to see more > Decode Input Data
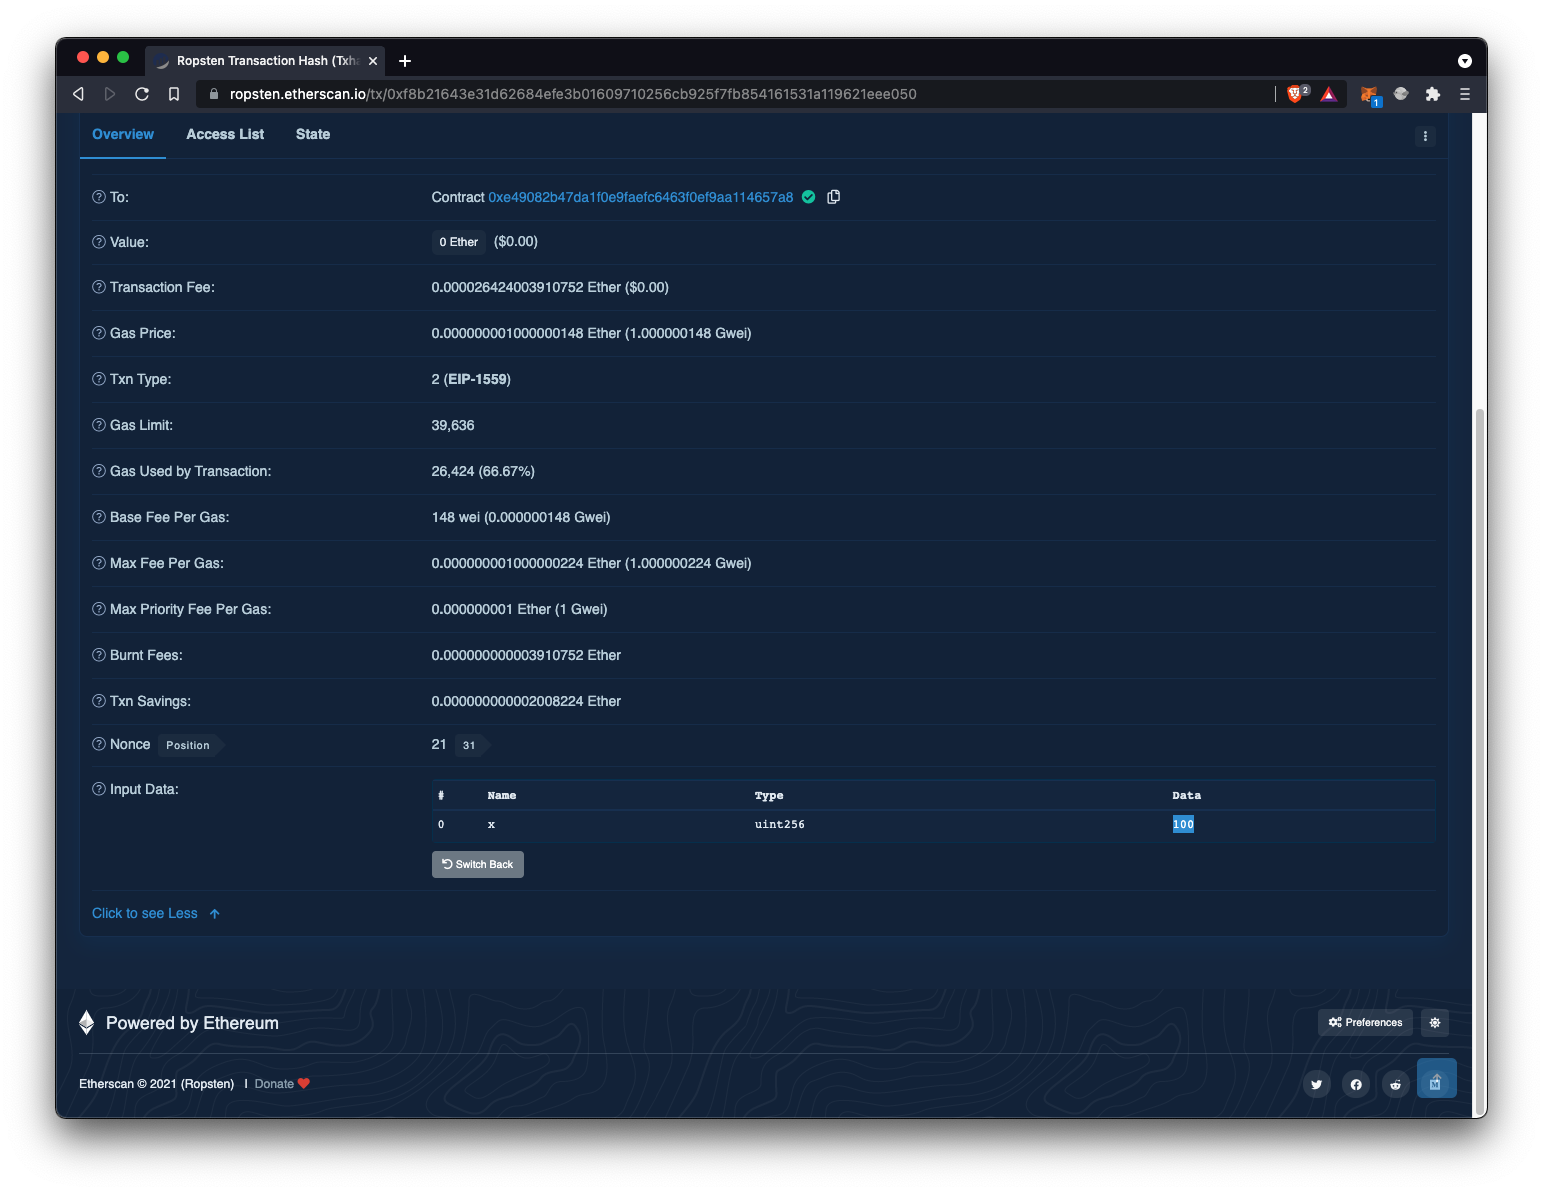
Hurra! We successfully send a signed transaction using Metamask on the Ropsten Network.
Here is the HelloWorld.vue full and final code:
<template>
  <div>
    <div >{{ accounts[0] }}</div>
    <button @click="setNewValue">SendTransaction</button>
  </div>
</template>

<script>
import detectEthereumProvider from '@metamask/detect-provider';
import Web3 from 'web3';
import MyContract from '../../../contract/build/contracts/MyContract.json';

export default {
  data() {
    return {
      contractAbi: MyContract.abi,
      contractAddress: "0xe49082b47dA1f0E9FAEfc6463f0ef9aA114657A8",
      provider: '',
      web3: '',
      contract: '',
      accounts: '',
      message: 100,
    }
  },

  async mounted() {
    await this.setup();
    this.provider = await detectEthereumProvider();
    if(this.provider){
      await this.getAccounts();
    }else{
      console.log('Please, Install Metamask!');
    }

  },

  methods: {
    async setup(){
      this.web3 = new Web3(window.ethereum);
      this.contract = new this.web3.eth.Contract(this.contractAbi, this.contractAddress);
    },

    async getAccounts(){
      this.accounts = await this.provider.request(
        {
          method: 'eth_requestAccounts',
        }
      )
    },

    async setNewValue(){
      const receipt = await this.contract.methods.set(this.message.toString()).send({
        from: this.accounts[0],
      });
      console.log(receipt);
    }
  }
}
</script>
This is the end of the Web3 course. I hope you enjoyed it. Feel free to contact me if you had any questions, our improvement comments. Always keen to learn! Enjoy.